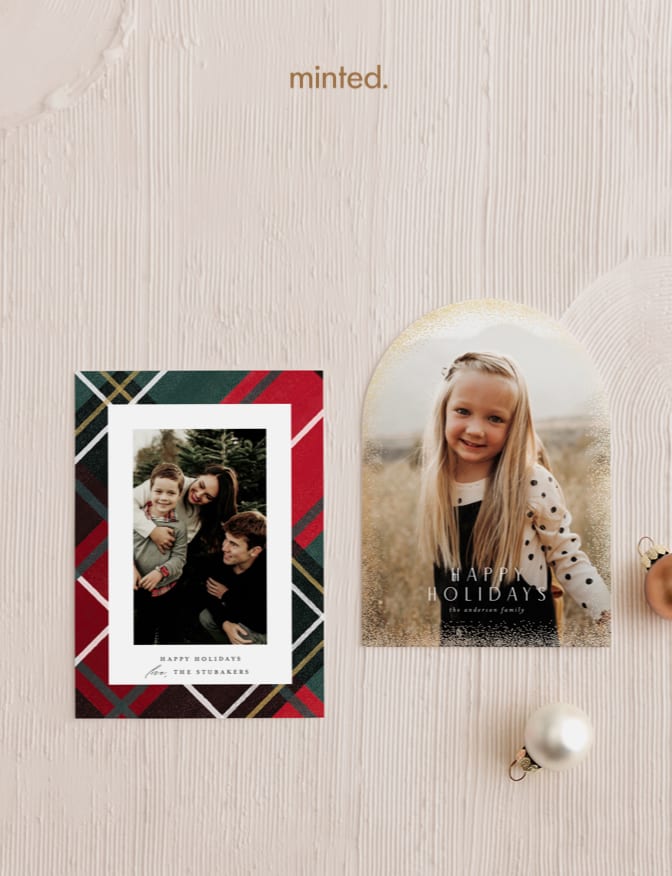
Merry Stripes, designed by Amy Kross
Christmas is fast approaching, are you ready? With the holidays on their way, people will be layering on the tinsel, the cookies, the love, and...the holiday cards. With the influx of heartfelt messages, you may be trying to find a creative holiday card display idea for the season. Christmas card display holders come in many shapes and sizes, allowing you to turn your loved ones’ messages into a piece of your holiday decor. Check out these fun ideas and dress up your mantel with the memories of loved ones. A beautiful DIY Christmas card holder will allow each card you have received shine, building upon the family connection, gratitude, and well wishes for the New Year… while showing off some DIY skills to your friends and family.
For a unique and fun way to show off this year’s growing stack of Christmas cards and holiday cards, look no further than this DIY Christmas card holder idea. Using bright and modern clay, you’ll create trees to perfectly display cards around your home or on your mantel. Make this into a DIY project even the kids will enjoy participating in. To get started, you will need Polymer clay, a hot glue gun, a baking sheet, parchment paper, smooth-sided drinking glass, tin foil, and a knife. Take your selected clay and roll it into flat pieces 1/2″ thick. Cut small cubes and triangles and add a slit into the top of each triangle. Slip a piece of tin foil into the slit. Place the triangles and support squares onto a parchment-lined baking tray and bake. Once cool, use the hot glue gun to attach the support squares to the trees to help with the stability of the stand. Then, display them around the house with the holiday cards you’ve received throughout the season.

If you’re looking for a splash of color for your Christmas card display holder, look no further than this modern DIY option made of cork tiles. It’s a clean and simple way to display the season’s greetings. To achieve this look you will need 6" x 6" cork tiles, masking tape, a paintbrush, paint, and letter stickers.
Line masking tape or painters tape in a diagonal across the face of your cork board tiles. Paint numerous coats of paint onto one half of each corkboard. After the paint has dried, you can remove the tape and attach one letter sticker to each tile. Spell out a desired message that feels appropriate for the season to you, such as “Tis The Season”. Attach tiles to the wall with adhesive hanging strips and from there you can proudly display Christmas cards using push pins. And just like that, your holiday cards are ready for all to see and enjoy!

Add some color to a blank wall with Christmas card display holder bars. Choose to hang the bars vertically if you prefer to transform your wall into a collage of festive colors and images. You can also mount the display bar horizontally over a mantel, bookshelf, or desk for an organized look that doesn’t take over an entire wall. Minted offers beautiful display bars that are 3”, 4”, or 5” in length with a copper or brass finish. Order multiple bars and arrange them artistically in your house so you and your house guests can appreciate your holiday greetings in style.

A Christmas card display holder that exudes the spirit of Christmas is one made of garland. You can buy some fresh garland from your local Christmas tree nursery or purchase a synthetic one. We also have an article on how to craft your own garland. The placement of your garland is the most creative piece for this project. You can play around with strewing it across your mantel or even hanging it along your doorframe. Once you are sure the garland is securely attached to the wall or the mantel, you can use ribbon or clothespins to hang your holiday cards against it. Your home will then really feel dressed up for the holidays!
Imbue the warmth of the holiday season by using a strand of twinkly lights as a Christmas card holder. How this turns out will largely be dictated by where you place your hooks and how you shape the string lights. In order to complete this look, you can use a pencil to map out the placement of your hooks. Once you have screwed in your picture hooks, hang your twinkly lights and adjust their tautness however you prefer. Once you are pleased with the layout of the lights, fasten your holiday cards onto the structure using paper clips, clothespins, or binder clips.
A variation to the twinkly light approach would be to use a ribbon of jingle bells or twine. You can apply the same technique and display as many cards as you wish!
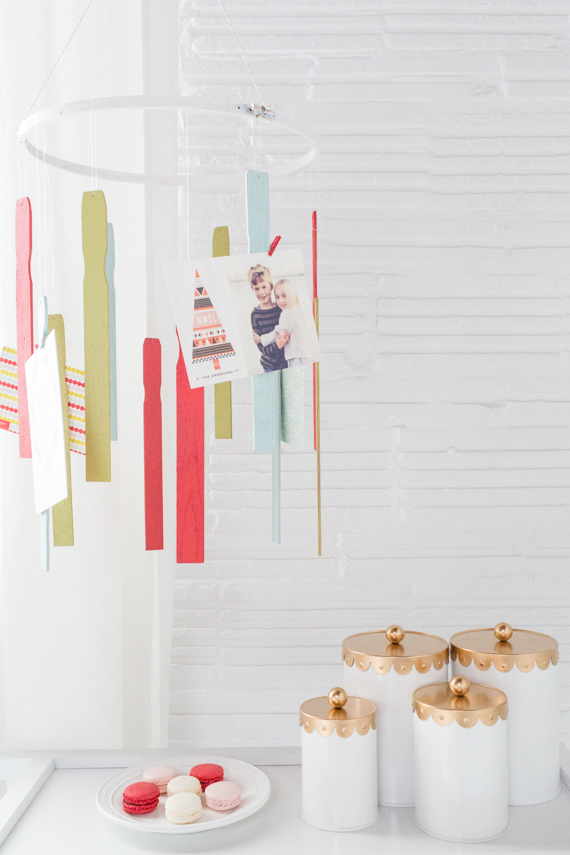
Paint stirrers… Who knew they could be used for something as creative as showcasing Christmas cards? This DIY holiday card display idea can be achieved after a trip to your local hardware store. To start you will need 11 wooden paint stirrers, an embroidery hoop, spray paint in the colors of your choice, a drill, clear fishing line, twine, a key ring, scissors, and mini wooden clothespins.
To start, drill a hole at the top of each paint stirrer. Next, spray paint each paint stick (both sides) and the embroidery hoop in the colors of your choosing. Try to stick to three or four colors. Once all elements are completely dry, use the fishing line to attach each painted stir stick to the embroidery hoop. Hang the sticks at varying heights for an artistic look. Taking three equal lengths of twine, knot them to the embroidery hoop in a triangle formation, making sure they are each evenly spaced. The tops of the three twine strings can loop through a circular key ring. Finish off your DIY holiday card mobile with mini wooden clothespins that will secure your cards to the paint sticks. This totally unique and attention-grabbing display idea can easily be repurposed after the holiday season has passed!
Wreaths come in many forms, allowing room for many interpretations on how to spread holiday cheer and show off your favorite cards. This season, try these DIY wreath options to make your friends’ cards feel right at home.
A garland wreath, being so quintessential Christmas, is a wonderfully traditional way to display your Christmas cards. In order to make this wreath, you’ll need a wire hanger, garland, green pipe cleaners, and clothespins.
First, unravel your wire hanger and bend it into the shape of a circle. You can purchase a metal ring at most craft stores. Take your garland and wrap it around your wire, making sure you cover the entirety of the wire for a fuller effect. Once the wire is hidden, fasten it using green pipe cleaners or a hot glue gun and clip on your favorite Christmas cards using clothespins! You could even opt to hang your wreath from the ceiling like a chandelier, with your cards cascading down.
Another holiday card holder idea involves recycling your past Christmas cards. Christmas can be a time notorious for purchasing single-use items, perpetuating the notion that the holiday season is no longer representative of good spirits but more about commercialization and waste. Rather than buy more items, why not reuse Christmas cards of the past to display your current cards? In order to upcycle your cards, you’ll need a holly leaf stencil, pencil, scissors, old holiday cards, hot glue gun, toothpicks, and a 10-inch styrofoam wreath.
Using a DIY holly leaf stencil, trace holly leaves onto old Christmas cards using a pencil. Once you have plenty of leaves traced, take your scissors and cut them out. Take your hot glue gun and glue toothpicks behind each leaf, leaving about 1-inch at the bottom of each leaf, as a stem. Stick your leaves into the 10-inch styrofoam wreath and repeat until the styrofoam is completely covered. Once you have your wreath, hot glue your current holiday cards onto the wreath, interspersing your 2020 holiday cards with upcycled holiday cards from the past.
Place cards aren’t just for, you know, place cards! If you recently were married or recently threw a dinner party, why not reuse your old holders to display your family and friends’ most treasured memories? If you don’t have place card holders readily available, you can check out Minted’s place card holders. They come in a variety of colors, including wood, silver, brass, and brushed gold.

If you are short on space but overflowing with Christmas cards, try displaying your cards on the wall with a wall tree. It’s the perfect way to show off your beautiful cards while saving mantel space for other decorations! In order to make a wall tree you will need the following items:
Zig zag your twine across the wall to be in the shape of a pine tree, making sure to secure the switchbacks of your twine with some tape or a thumbtack. Get creative and make the tree as tall and wide as you want! When you are pleased with the results, replace the tape with a decorating clip. That way, rather than solely relying on tape to hold your tree up, you can hook your twine over the clip for a cleaner look and feel. Once your twine tree is secure, you can start having fun with the decorations. First, place your holiday cards throughout the tree, securing them with clothespins. Second, cut out a star or topper for the tree, using construction paper or card stock. Use tape to adhere the star against the wall. Last, but not least, dress up your tree by hanging miniature ornaments around the cards. For a personal touch, include some photo ornaments with pictures of your loved ones. This wall tree will show off the variety of cards you have received and add a nice holiday touch to a portion of your house that would have otherwise been bare.
A creative Christmas card display holder idea that also won’t take up much space is to use your already hung Christmas stockings. After you have filled them with trinkets and toys, place your favorite cards on top. That way your mantle can display presents as well as memories. Did you know Minted sells custom stockings with personalized leather tags!

Another way to display your Christmas cards is to use a branch arrangement purchased from your local craft store or gathered from your backyard. Arrange the branches in a beautiful vase, similar to a bouquet. You can then artistically place some of your favorite cards among the branches. Since this Christmas card display idea is small, less is definitely more in this scenario. Select cards that complement one another and don’t busy the limited space. Once you have selected your cards, you can affix them to the branches using wooden clothespins or hot glue. If you feel your branch arrangement needs a bit more, experiment with adding in ornaments, ribbons, or Christmas flowers.
We love this simple and stylish idea from Ashley Muir Bruhn of Hither & Thither. Rather than letting her cards pile up, she creates a family flipbook for all to enjoy. For supplies, all you need is a binder ring and hole punch, in addition to a stack of holiday cards. As you receive holiday cards from loved ones, punch a hole in the corner of each one and slip the card onto the binder ring. Continue adding to the ring throughout the holiday season and enjoy flipping through your collection with your kids. You could even start a new bedtime holiday tradition or telling a story about each card! Once the holiday season has passed, add your family card to the top of the flipbook and preserve the interactive display for years to come.

For most families, the Christmas tree is the pride and joy of all Christmas decorations. You spend an afternoon at the nursery or farm selecting the perfect shape and size, carefully pack it on top of the car, unpack it in the house (strewing pesky pine needles all over the floor!), and tend to it throughout the season so it stays looking full and healthy. When you have guests over, they will certainly be admiring your decorative tree. Wouldn’t it be nice if guests could also share in the memories of your collection of Christmas cards as well? Of course!
If you want to display your Christmas cards on your Christmas tree, you could try several different methods. You could apply the trusty clothespin approach and fasten your cards onto the branches. You could poke holes into the cards, using an awl, and thread ribbon or twine through the cards to tie them onto the branches. You can even use the hooks of existing ornaments and repurpose them on your holiday cards. The point being, you have many options to display your cards with this approach.
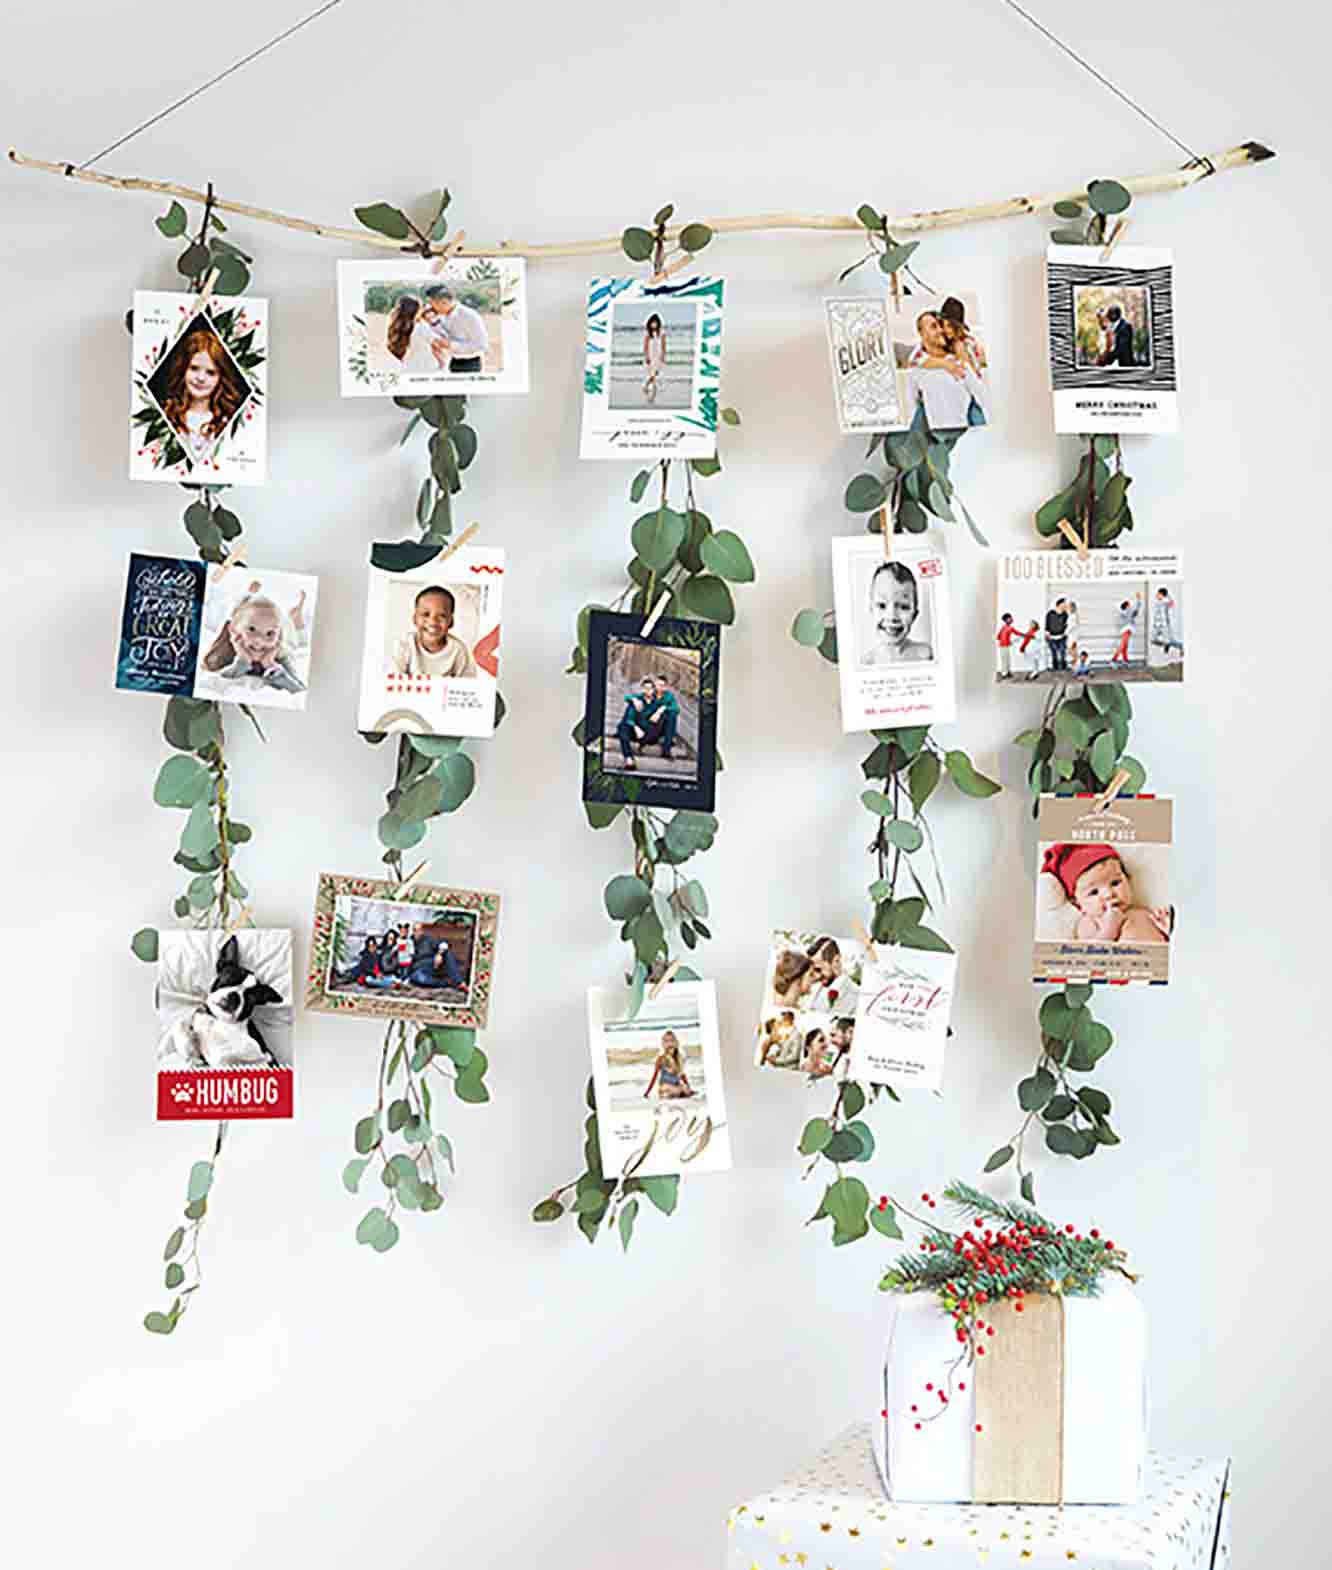
Eucalyptus can make for a beautiful and festive wall hanging. This simple DIY project is a charming way to display your holiday cards in 2020. To achieve this hanging display, all you need is wire, fresh eucalyptus greenery, and a nice long branch. Begin by trimming small pieces of eucalyptus. Then using floral wire, combine the clippings to form a thin lanyard of greenery measuring around 3 feet. Hang your eucalyptus vines from the wood branch and use clothespins to attach your colorful Christmas cards! An added bonus of this Christmas card display idea is that your house will be filled with the relaxing aroma of eucalyptus.
These easy-to-make magnetic picture rails are the perfect solution for showing off your collection of holiday receivables. And, when the New Year rolls around, keep the picture rails up and simply swap in new family pictures on a monthly basis! All you will need to get started on the DIY Christmas project are wooden balusters, a hot glue gun, and magnets. Hot glue the magnets along the entire length of the wooden baluster, setting them equal distance apart. We recommend every 5 to 7 inches, which will allow space between each card. Once dried, use your adhesive hanging stripes to secure the baluster to your wall. Purchase your favorite decorative or seasonal magnets to show off your holiday cards!

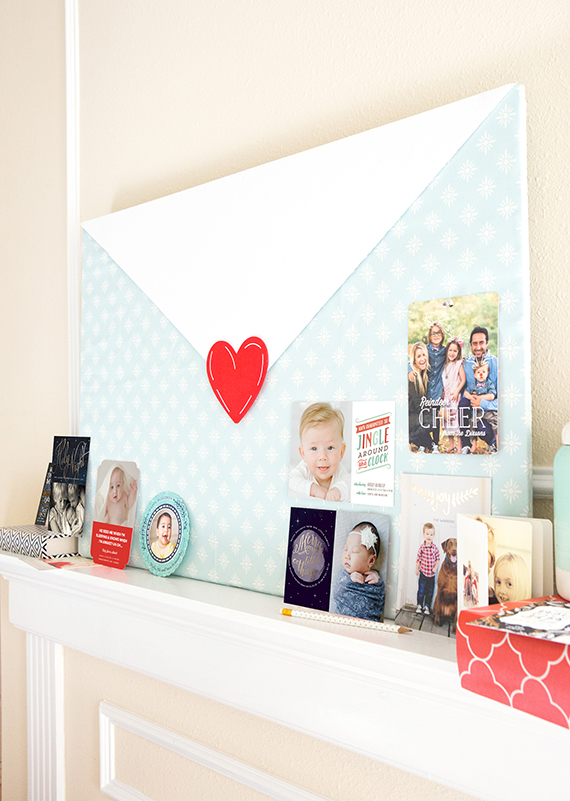
This idea was created for us by Melissa Fallon of Design Eat Repeat. You will notice that the pinboard is designed to look like an envelope sealed with a heart. So after you show off your Christmas cards in December, you can quickly re-use this pinboard again in February to present a round-up of your Valentine’s cards.
To create this piece at home you will need a 36″ x 24″ corkboard, a yard of fabric, a hot glue gun, white foam board, a heart embellishment or red card stock, and thumbtacks.
Once you have ironed your fabric to remove any creases, place the fabric on the floor (pattern side down) and place your corkboard on top. Aim to have a perimeter of excess fabric around the entire corkboard. Fold the excess fabric over the corkboard and glue it down, aiming to achieve a tight wrap. Next, you will want to cut a large triangle out of your white foam board and glue it down onto your fabric-covered corkboard to achieve the look of an envelope fold. Complete the look by gluing down a giant red heart (fashioned from red construction paper) in the center of your display board. Once ready, find the perfect spot in your home to display your new fabric display board!
We uncover design genius through ongoing design competitions. At Minted, all that matters is good design. Designers submit, and the Minted community votes to tell us what to sell.